

Chia Pudding
If you’ve never made chia pudding before, get ready to have your mind changed about what “healthy breakfast” can taste like. This one’s creamy, a little sweet, and comes together in about five minutes flat — the hardest part is just waiting for it to set overnight. I make a batch of this almost every Sunday so I’ve got breakfast handled for half the week.
Why You’ll Love This Recipe

This is one of those recipes that feels fancy but takes almost no effort. You literally just stir everything together in a jar and let the fridge do the work while you sleep.
It’s endlessly customizable too. Once you’ve got the base ratio down, you can swap in whatever milk, sweetener, or toppings you’re in the mood for that week.
And honestly, the texture is the best part. Those little chia seeds plump up into something between tapioca and rice pudding, and it’s way more satisfying than you’d expect from something this simple.
Ingredients You’ll Need

The star here is obviously chia seeds — they’re the tiny black (or white) seeds that do all the magic. When they sit in liquid, they soak it up and form that signature gel-like pudding texture, so don’t skip letting them rest long enough.
For the liquid, I usually go with coconut milk because it makes everything extra creamy and a little tropical, but regular milk, almond milk, or oat milk all work great too. Just know that thinner milks like almond milk will give you a slightly looser pudding, while something rich like full-fat coconut milk gets you that thick, spoonable texture.
Sweetness comes from maple syrup in my house, but honey works just as well if that’s what you’ve got. Vanilla extract rounds everything out and makes it taste like dessert even though it’s basically breakfast. A pinch of salt might sound unnecessary, but it really does wake up the flavor.
Tips for the Best Results

Give it enough time. I know it’s tempting to check on it after an hour, but this really does need at least 4 hours, and overnight is even better, for the seeds to fully plump up.
Don’t be afraid to adjust the thickness. If it’s too thick in the morning, just stir in a splash more milk. Too thin? Add a spoonful of extra chia seeds and let it sit another 30 minutes.
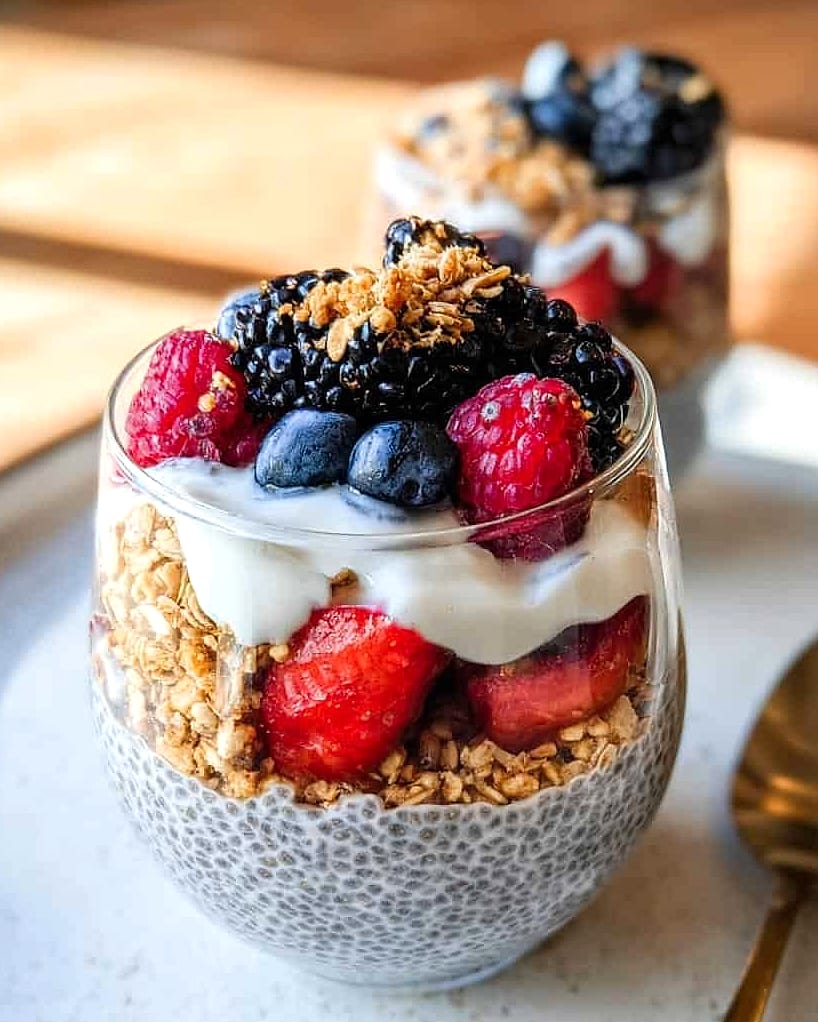
Layer it up for looks and flavor. Alternating chia pudding with yogurt or fruit in a glass jar makes it look like you tried way harder than you actually did.
Storage and Reheating

Chia pudding is basically the meal-prep dream because it keeps so well in the fridge. Store it in an airtight container or mason jar and it’ll stay good for up to 5 days.
Just give it a quick stir before serving each time, since it can settle a bit as it sits.
Frequently Asked Questions
Can I make chia pudding without dairy?
Absolutely. This recipe is naturally dairy-free as long as you use a plant-based milk like almond, oat, or coconut milk.
Why is my chia pudding not thickening?
It usually just needs more time, or you didn’t use enough chia seeds relative to the liquid. Give it a full 4 hours minimum, and stir well early on so the seeds don’t clump.
Can I freeze chia pudding?
You can, though the texture changes a bit once thawed and can get slightly grainy. It’s honestly best enjoyed fresh within that 5-day window.
What toppings go best with chia pudding?
Fresh berries, sliced banana, granola, shredded coconut, or a drizzle of nut butter all work beautifully. I usually just use whatever fruit I have on hand.
product: Mason jars with lids — perfect for mixing, chilling, and grabbing individual servings straight from the fridge.
Chia Pudding

A creamy, no-cook overnight pudding made from chia seeds, milk, and a touch of maple syrup.
Ingredients
- 1/4 cup chia seeds
- 1 cup coconut milk
- 1 tablespoon maple syrup
- 1/2 teaspoon vanilla extract
- 1 pinch salt
Instructions
- Step 1. Add chia seeds, coconut milk, maple syrup, vanilla extract, and salt to a jar or bowl.
- Step 2. Stir well until fully combined, making sure no seeds are clumped together.
- Step 3. Let sit for 5-10 minutes, then stir again to prevent settling.
- Step 4. Cover and refrigerate for at least 4 hours, or overnight.
- Step 5. Stir before serving and top with fruit, granola, or nut butter as desired.